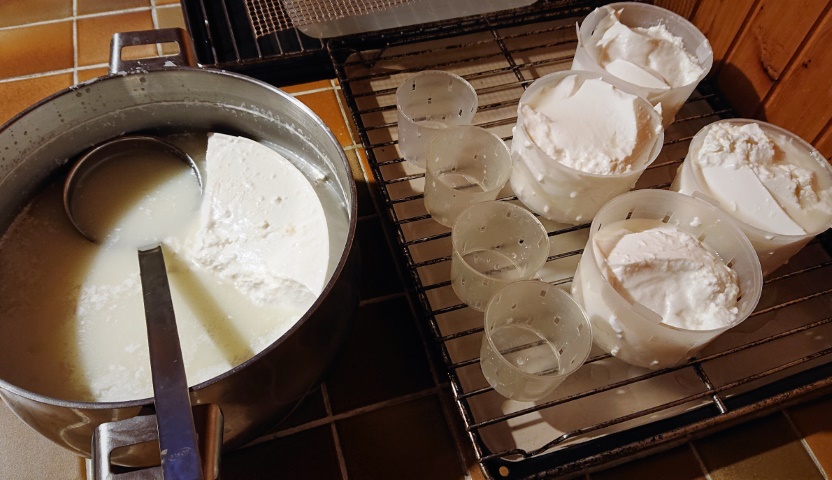
 Molding the curd to make lactic goat cheese.
Most of goat cheeses are lactic cheeses, following the same base recipe. A lactic cheese can be eaten at any step of the making process. That’s why you can find such a variaty of goat cheeses: fresh, creamy, runny, dry… All are made following the same first steps. Then depending on how long you wait and the ripening conditions, you can obtain very different taste and textures. In a previous article I explained how to make lactic cheese from raw cow milk. The recipe is basically the same here, except that the milk comes from goats and not from cows.
You can just follow the recipe from that link by replacing the raw cow milk by raw goat milk. Again, don’t be too stressed by the timings that are given. They will highly depend on many different conditions like the milk quality, the temperature and humidity of your place. Try to use your best judgement to go from a step to another. I could summarize the different steps as follows:
- let the milk+ferments+rennet to curd for ~24hrs at room temperature, the curd should fall at the bottom of the pot and get covered by the resulting whey
- mold the curd, flip back the molded cheeses into their molds when they are firm enough
- salt the cheeses (either in their molds or not) on all faces
- let them dry at room temperature (try not too exceed 25°C, the fermentation may be too fast and result in a bad bitter taste)
- start ripening (in your cave, in your fridge, anywhere that’s not too hot and safe from flies, ideally below 20°C)
You can eat the cheese at any of these steps. That just depends on your taste… and your patience! For instance, right after molding, you get a very fresh cheese that we call ‘faisselle’ in French. You can eat it like a yogurt, with jam, sugar or honey. Or even with salt, pepper and a bit of olive oil. Just after salting, you get a very fresh goat cheese. It is very good in a salad, or in a pie for instance. And if you wait longer it will take more taste and different texture.
Many ways of ripening cheese
After salting there are different parameters on which you can play to get different types of cheese:
- time: the more you wait, the stronger it smells and tastes. The cheese looses its lactic taste day after day.
- temperature: the higher the temperature, the faster the aging. Optimal temperature is between 12°C and 16°C. If your room temperature is 20°C, better to put it into the fridge one day after salting. In the upper part of your fridge the temperature should be around 10°C or a bit lower. It is fine, your cheese will just take longer to ripen.
- humidity: higher humidity also accelerate cheese ripening. It is generally recommended to let the cheese at a level of ~90% of humidity for the first days of ripening but if you can’t that’s not a big deal. The rind will start to make some ‘waves’. It gets runny below the rind and the yeasts on the surface of the cheese try to occupy the most of surface to multiply. If you keep letting your cheese at a high humidity level, the rind will keep soft and the cheese should keep creamy. On the other hand, if you decrease the humidity level, the rind may dry and create nice wrinkles. The inside will keep firm and creamy.
NOTE: the shape of your molds and the size of the cheese also influence a lot on the aging process. Bigger the cheese, longer it will take to ripen, especially at the heart of the cheese. It is better to ripen big cheeses at lower temperature to avoid too fast aging of the rind compared to the inside.
Examples
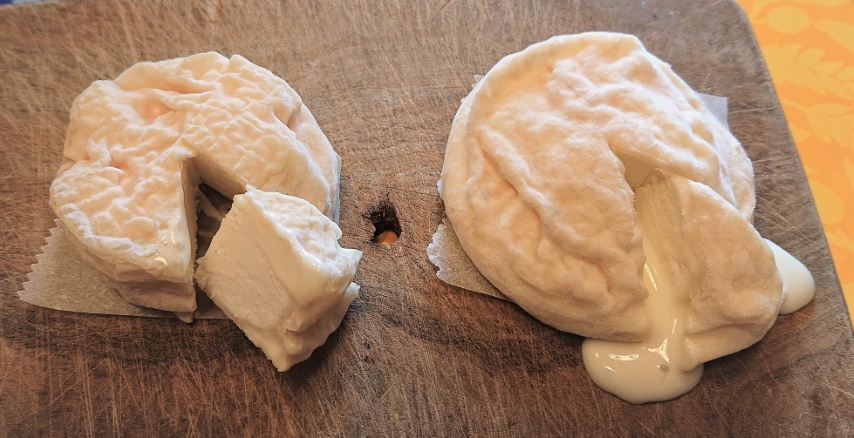 Example of two cheeses ripened in different conditions. The right one was ripened at a higher humidity level.
In the picture above you can see two cheeses made from the same curd but ripened differently. The picture was taken two weeks after making. A few days after salting, the left one was left at room temperature (it was around 20°C) on a grid without anything on top. For the right one, I had put a box on top of it, while letting some space below the grid to let the air circulate (see picture below). The box on top was keeping the humidity level higher than the room temperature.
You can observe that the cheese that was in drier conditions made smaller wrinkles than the other one. This is a good observation trick to understand how a cheese you buy at the store is aged.
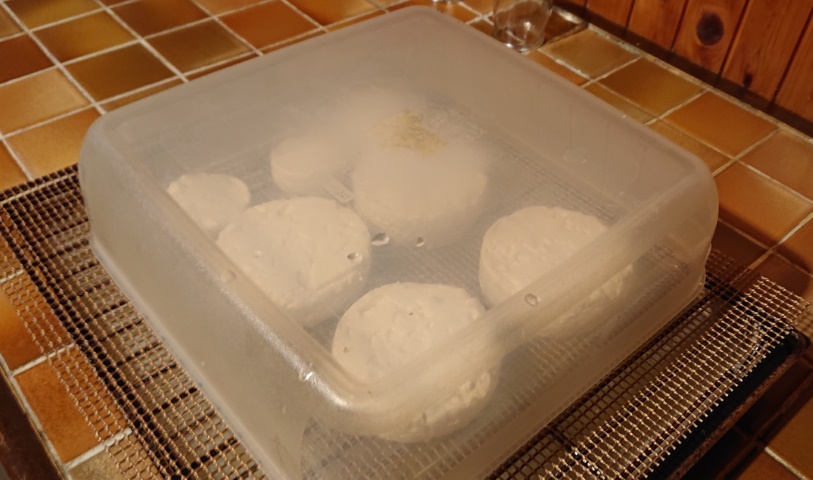 The cheeses are placed on a grid and a box on top to keep a higher humidity level than in the room.
Instead of using a grid, you can also use hay, if that’s something you can get easily. It will give a fresh and unique herby taste.
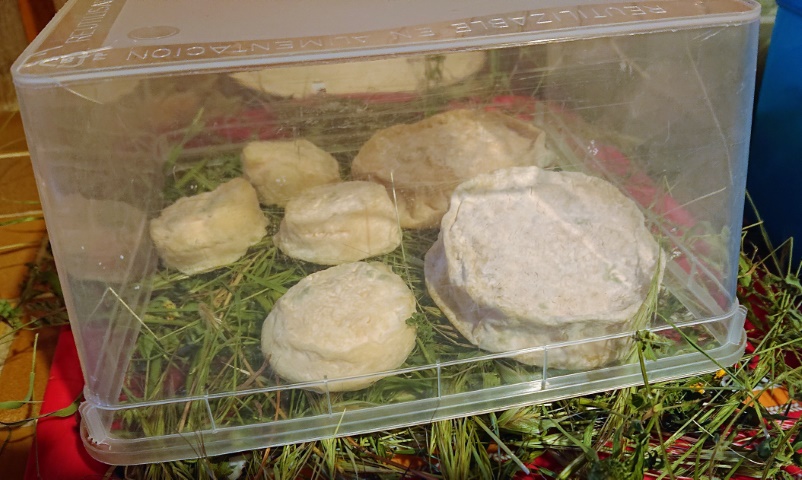 Instead of a grid, here the cheeses are placed on hay.
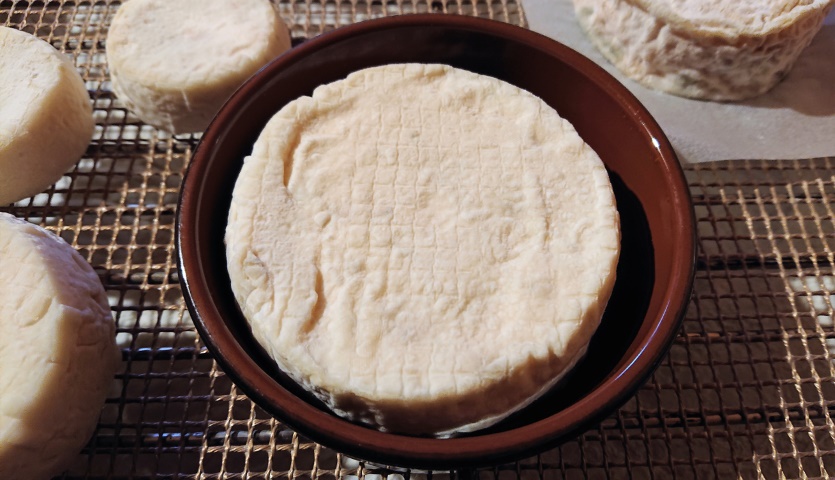 You can also ripen your cheese in a ramekin.
You can also ripen your cheese like a Saint-Marcellin, in a ceramic ramekin. As the lower side will be in contact with the ramekin, it will get more creamy. In that case, wait a few days after salting that the cheese starts aging before putting it in the ramekin. To know if the cheese is ready, look for a soft texture on the rind. It gets covered by a thin layer of white yeast.