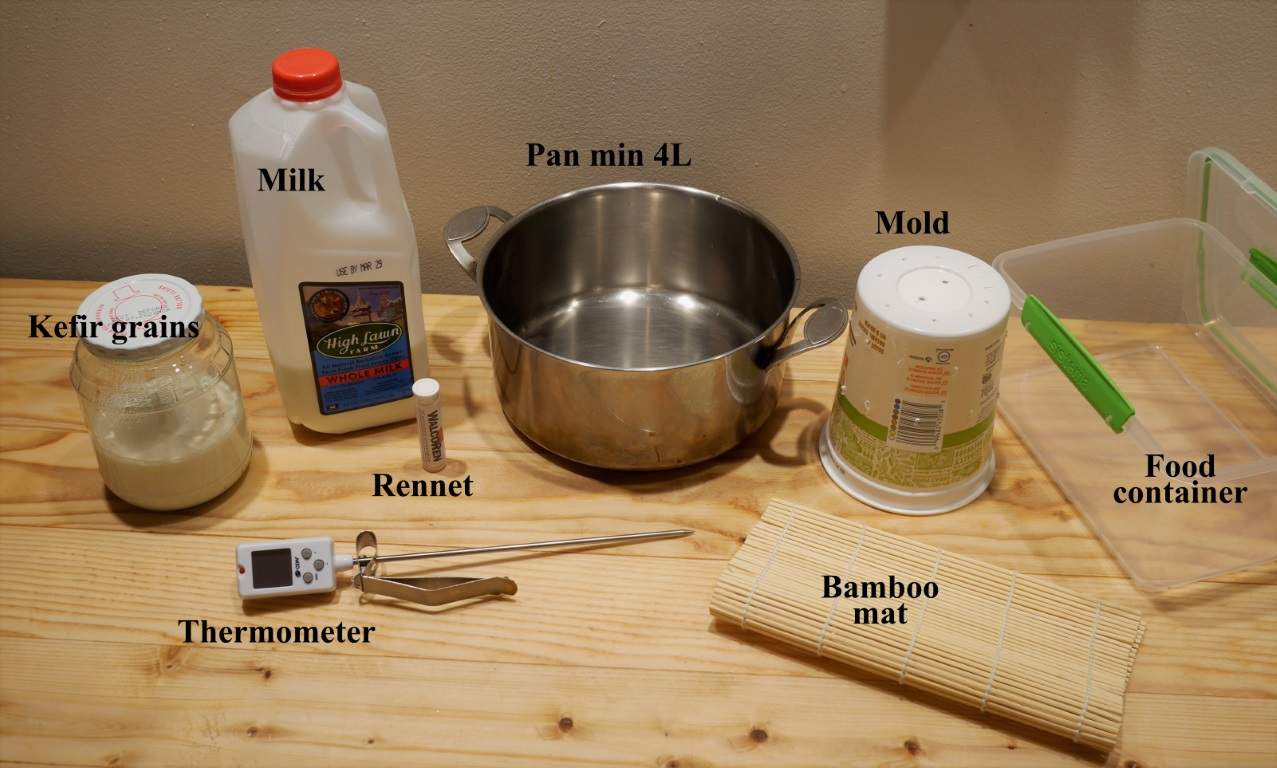
Making cheese at home does not require an expensive equipement. This will not cost you more than a dozen of dollars, especially if you can re-use material from your kitchen. You can find below a list of the minimal starting kit (see also the picture).
Milk (of course!)
See this article for more details about milk. And look at the resources page to check where to buy raw milk.
Kefir grains
Kefir grains are generally shared among users. When fed properly, kefir grains multiply and one generally end up with too many grains after some weeks or months. To find kefir grains donors, you can use facebook or online forums. If you live in Boston (MA), you can join the Boston Culture Sharing group.
If you cannot find neighbors who could share grains with you, you can also buy them online. I could buy good quality kefir grains (about 20g) on this website for about $20.
Rennet
I am using calf rennet in a tablet form (natural product from calf stomach). So far I have been satisfied with the brand Walcoren(without GMO), that’s also the brand recommended by David Asher in his book. For $20 you get 20 tablets, that allows you to use about 120L of milk for cheese making. In my preliminary experiments I used liquid rennet. I found it more difficult to dose out. It can also be kept less longer.
Pan
You will need a pan to heat up the milk and prepare the curd. Get a pan holding at least 4L.
Thermometer
If you like cooking, invest in a good thermometer from the beginning. I had already several in a few years, cheap ones don’t last very long and often break down when you need it the most! Here are some criteria I find very convenient (for cheese making and pastry cooking as well):
- option to set a maximum warning temperature (when your preparation reaches the temperature you set, the thermometer bips)
- a clamp, to leave it attached it on the pan
Container
You will need a container to ripen your cheese. Better to have a storage that’s a lot bigger than your cheese. If your cheese has more space to live in, that will be easier to control the humidity level. Plastic containers are fine, but if you can find one made from glass that’s even better. I generally pay attention to not leave the cheese in contact with plastic. I use a bamboo mat for that purpose. If the lid can be left slightly open that’s a plus that will help you control the humidity level.
Bamboo mat
At the very beginning I did not have any bamboo mat. I was using a grid from my oven, to let the cheese dry. In the ripening boxes I was putting the cheese on chopsticks (not very convenient!).
Then I discovered I could buy a dozen of bamboo mats for a few dollars. Those are very convenient, food safe and can be cut to the right size. They can be used both for straining step, drying and in ripening boxes. I generally re-use them after brushing them with hot water and soap and them letting them soak in white vinegar for a few hours and then rinsing them with cold water.
Mold
For some cheeses you won’t even need a mold (for instance Saint-Marcellin, ricotta, stretched cheese etc.). As a start you can just use any cylindrical plastic container and drill some holes with a knife. On the picture you can see an exemple made from a yogourt pot.